

Running a Deadside server can be a thrilling experience, allowing you to customize your gameplay to suit your preferences and create an ideal environment for players. If you've chosen GG Host as your server provider, you've got access to powerful and user-friendly tools to manage your server's settings. This step-by-step guide will help you navigate the GG Host server control panel to access and update your Deadside server settings efficiently.
Step 1: Initial Server Setup
When you first rent a server for Deadside through GG Host, you first need to choose between the PC version and the Console version. Cross play is exclusive to Console and only possible between PS5 and Xbox Series.
Once you know what server you need, please provide us a few key details:
- Server Name: Choose a unique name that players can easily recognize. Use underline for spaces and do not use special characters.
- Admin's Steam64 ID (For PC - Optional): This 17 digit unique number is crucial if you want to have admin privileges directly in the game.
- Admin's EOS ID (For Console - Optional): This unique string of numbers and letters is crucial if you want to have admin privileges directly in the game.
Once you've filled in these details, GG Host will set up your server, and it will be ready for customization through the TCAdmin control panel. These settings can be adjusted anytime, by simply stopping the server and updating the fields as needed.
Step 2: Accessing the Server Control Panel
To modify your server settings, log into the GG Host server control panel powered by TCAdmin. This panel is your central hub for all server management tasks. Here’s how to navigate it:
- Log In: Enter your credentials to access the dashboard. You will have received them in an email with the subject: Your Control Panel Login (These are not the same credentials used in the main website)

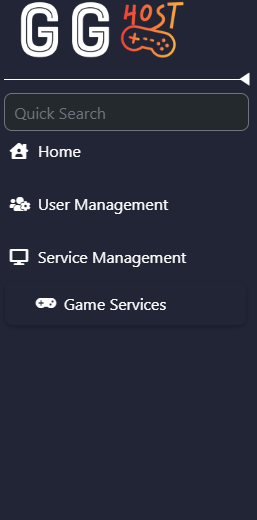
- Navigate the Panel: After you log in, use the side menu on desktop/console, or click the GG Host logo on your mobile browser. You'll want to click Service Management, then Game Services.
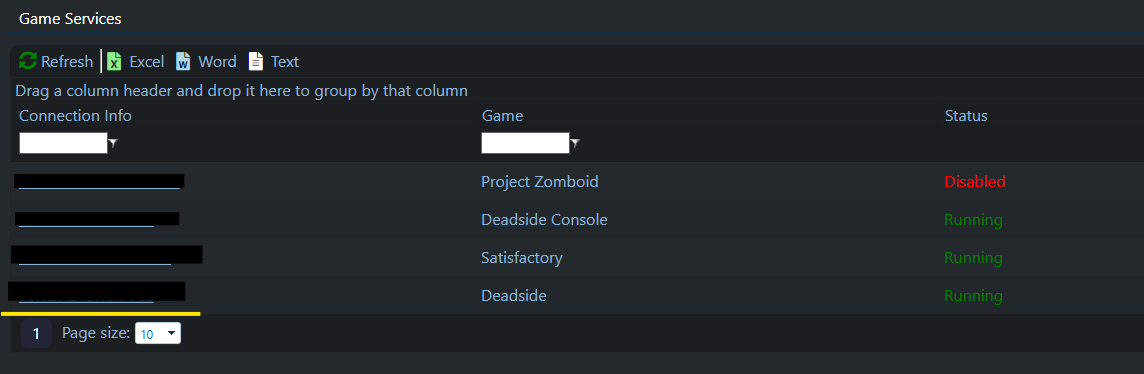
- Select Your Server: Find your Deadside server listed under “Game Services.” Click the underlined IP address to select your service.
Step 3: Modifying Map Selection and Server Name via Config Editor
Once you're in the service page in the control panel:
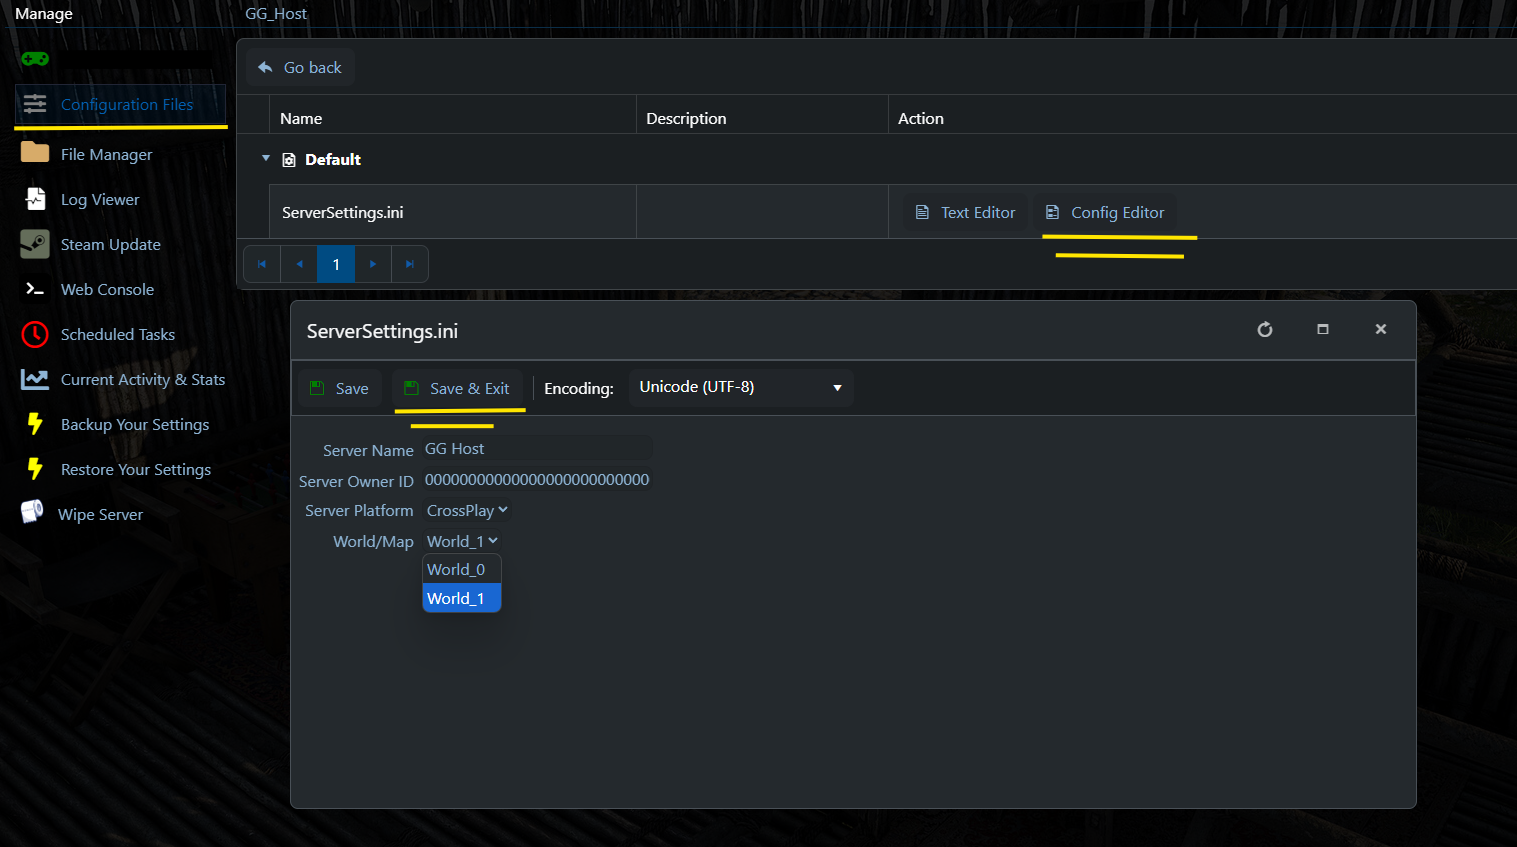
- Navigate to Configuration Files: Here you'll find various settings files you can edit.
- Open Config Editor next to the
ServerSettings.inifile. This is where most of the crucial settings are housed.
Pro tip: It is always best to stop the server first, and only then proceed to change the config settings as needed. Save the changes and start up the server once everything is set.
Key Settings to Modify:
- Server Name: Update this as needed. Use underscores instead of spaces and avoid special characters, such as quotes, pipe and apostrophes.
- Admin EOS ID (For Console Servers): Long unique string of numbers and letters starting with 000. Ensure this ID is correct to obtain admin control within the game.
- Admin Steam ID 64 (For PC Servers): Long unique string of 17 numbers starting 765. Ensure there are no empty spaces copied along the ID.
- Server Platform (For Console Servers): Select PS5 Only or Cross Play (XboX+PS5).
- World/Map: Select World_0 for the original/large map Mirny or Select World_1 for the newer/smaller map Potny.
- Each world has its own save folder, and these worlds can be toggled back and forth by selecting the desired world in the config editor. Only one can be active at a time and no data is lost when changing.
After making your changes:
- Save the Configuration: Ensure all your changes are saved correctly. Make sure there are no typos or extra blank spaces.
- Restart Your Server: This step is vital as changes only take effect after a restart. Ideally, you should stop the server first, make the needed changes, and then start up the server.
Step: In-Game Admin Access
- If your Steam64/EOS ID was correctly saved and you are the main admin:
- Log into Deadside and start playing.
- (For PC) Press the F10 Key
- (For Console) Press all four buttons at the same time:
- Xbox (XSX/XSS): LT + RT + X + A
PlayStation 5: L2 + R2 + Square + Cross - This will bring up the admin panel in-game, if your ID was configured correctly. Here, you can access a plethora of settings to fine-tune your gameplay experience.
Conclusion
Managing your Deadside server settings via GG Host's TCAdmin-powered control panel is straightforward. Whether you're adjusting basic settings through the Config Editor or tweaking in-game parameters via admin access, GG Host provides all the tools you need for a seamless gaming experience.
For more assistance, the GG Host support team is always ready to help you get the most out of your gaming server.
For updates and more information, visit our website regularly or contact our support team. Enjoy your gaming adventure with GG Host – where gaming meets quality and reliability!
Need a Deadside server
GG Host is the official Deadside hosting provider, offering high-performance, low-latency servers and reliable support for your community. Order your Deadside server now: https://www.gghost.games/store/deadside
