


Windrose Dedicated Server - Getting Started
First Start
When your Windrose server is first provisioned, it needs to complete an initial setup:
- Navigate to your Windrose service management page.
- Click Start to boot the server for the first time.
- The server will generate its configuration files and create a default world. This may take a minute or two.
- Once the status shows Running, your server is ready to accept connections.
Note: On first boot, the server automatically generates a random invite code and creates a default Medium difficulty world.
Finding Your Invite Code
The invite code is how you and your friends connect to your server. To find it:
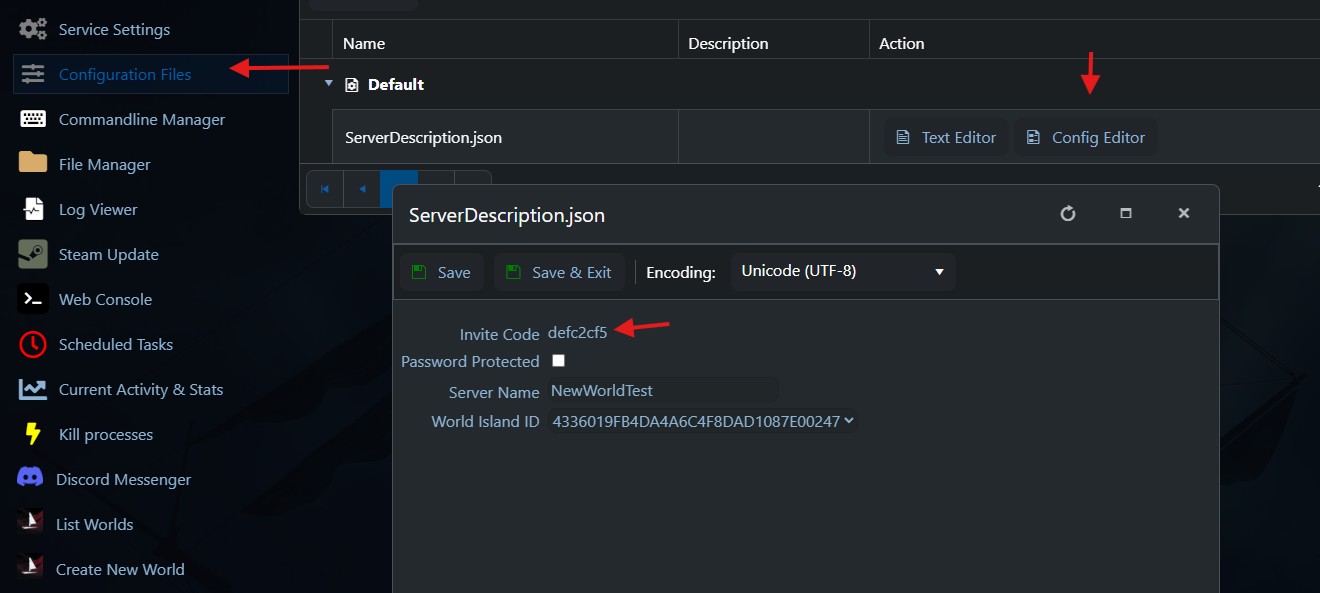
- Navigate to Configuration Files in the left-hand menu.
- Open ServerDescription.json using the Config Editor.
- Your invite code is displayed in the Invite Code field.
The invite code is case-sensitive and contains letters (a-z, A-Z) and numbers (0-9). We do not recommend changing it.
Connecting to Your Server
To connect to your Windrose dedicated server from the game client:
- Launch Windrose.
- From the main menu, go to Play.
- Select Connect to Server.
- Paste or type your server's invite code.
- If the server is password-protected, you will be prompted to enter the password.
- Click Connect.
Troubleshooting: If you receive a "Server not found" error, check that:
- Your server is running (status shows Running in the control panel).
- Your game client is up to date — a version mismatch between client and server will show as "Server not found" rather than a more specific error.
- You have entered the invite code correctly (it is case-sensitive).
Inviting Friends
To invite friends to your server, simply share your invite code with them. They can connect using the same steps above: Play → Connect to Server → paste the invite code.
The maximum number of players who can connect simultaneously is determined by your server's Max Player Count setting (see Server Configuration).